You’ve decided to give your kitchen a much-needed facelift. You’ve picked the perfect paint color, bought the brushes, and are ready to transform your space. But as you stand in front of your cabinets, you notice a sticky, grimy film that has built up over years of cooking. This is the moment many DIY projects go wrong. Painting directly over that grease is a recipe for disaster, leading to a finish that peels, chips, and looks anything but professional. Proper preparation is the secret to a flawless paint job, and that starts with a thorough cleaning. To achieve a durable, beautiful finish, you must effectively degrease kitchen cabinets for painting. Kitchen grease, oil, and food residue create a barrier that prevents paint from adhering properly to the surface. No matter how high-quality your paint is, it won’t stick to a dirty surface.
This guide will walk you through everything you need to know about this crucial first step. We’ll explore the best degreasing products, share a step-by-step cleaning process, and point out common mistakes to avoid. By the time you finish reading, you’ll have the confidence and knowledge to prep your cabinets like a pro, ensuring your hard work results in a kitchen you love for years to come.
Why Degreasing Kitchen Cabinets is Crucial for Painting
Think of painting as building a house; a strong foundation is non-negotiable. For painting cabinets, degreasing is that foundation. Paint manufacturers and professional painters consistently emphasize that surface preparation is the most critical factor for paint adhesion. When grease and grime are present, the paint sits on top of this unstable layer instead of bonding directly with the cabinet material.
Over time, this lack of adhesion will cause the paint to bubble, peel, or chip, especially in a high-traffic area like the kitchen. Daily use, temperature fluctuations, and humidity changes will quickly reveal any shortcuts taken during the prep for painting phase. A properly degreased surface ensures a smooth application, free of the bumps and imperfections that trapped dirt can cause.
Ultimately, taking the time to degrease promotes superior paint adhesion, which is essential for a long-lasting and durable finish. A clean surface allows the primer and paint to grip tightly, creating a resilient bond that can withstand the rigors of a busy kitchen. Investing a little extra time in cleaning now will save you from the frustration and expense of repainting sooner than you’d planned.
Best Degreasers for Kitchen Cabinets
Choosing the right cleaner is essential for effectively removing stubborn kitchen grime. While many products are available, professionals and experienced DIYers often turn to a few trusted grease-cutting solutions.
For heavy-duty jobs, Krud Kutter is a top recommendation. Its powerful formula is specifically designed to cut through years of accumulated grease and grime without leaving a residue, making it one of the best kitchen degreasers for paint prep.
Another powerful option is Trisodium Phosphate (TSP). For decades, painters have relied on TSP to clean and prepare surfaces for painting. It’s highly effective at removing tough grease and dirt, but it is a strong chemical that requires careful handling, including wearing gloves and eye protection.
If you prefer a more versatile and eco-friendly option, Simple Green All-Purpose Cleaner is an excellent choice. It is biodegradable and non-toxic, yet still strong enough to tackle moderate grease. Its versatility means you can use it for various cleaning tasks around the house.
For light grease, a simple DIY solution of dish soap and water can be surprisingly effective. A quality dish soap like Dawn is formulated to cut through grease on dishes, and it can do the same for your cabinets. This is a gentle and accessible option for routine cleaning.
Finally, a mixture of vinegar and water offers a natural alternative for mild cleaning. The acidity of vinegar helps break down light grease and grime. While not as powerful as chemical degreasers, it’s a great option for those who prefer natural cleaning methods.
DIY Degreasing Solutions: Can You Use Homemade Cleaners?
For those who are environmentally conscious or prefer to use what they have on hand, homemade cleaning solutions can be a viable option. The most popular DIY degreasers, a vinegar solution or a mixture of warm water and dish soap, are effective for light to moderate grease buildup.
A simple solution of one part white vinegar to one part warm water can cut through mild grease and also helps to neutralize odors. Dish soap, particularly a brand known for its grease-fighting power, can be mixed with warm water to create a sudsy cleaner that lifts grime from surfaces. The key is to rinse the cabinets thoroughly afterward to remove any soap residue, which could interfere with paint adhesion.
However, there are risks associated with using homemade cleaners. Some cabinet finishes, especially certain types of wood or laminates, can be damaged by the acidity of vinegar. Similarly, if not rinsed properly, soap can leave a film. It is always best to test your eco-friendly cleaners on a small, inconspicuous area first, like the back of a cabinet door, to ensure it doesn’t damage the finish.
How to Degrease Kitchen Cabinets for Painting: Step-by-Step Process
This detailed degrease process will guide you through cleaning your cabinets for a flawless paint finish.
First, gather your necessary tools. You will need your chosen degreaser, clean cloths or sponges, a bucket of clean water, and protective gloves. A drill brush attachment can save significant time and effort, especially on cabinets with intricate details.
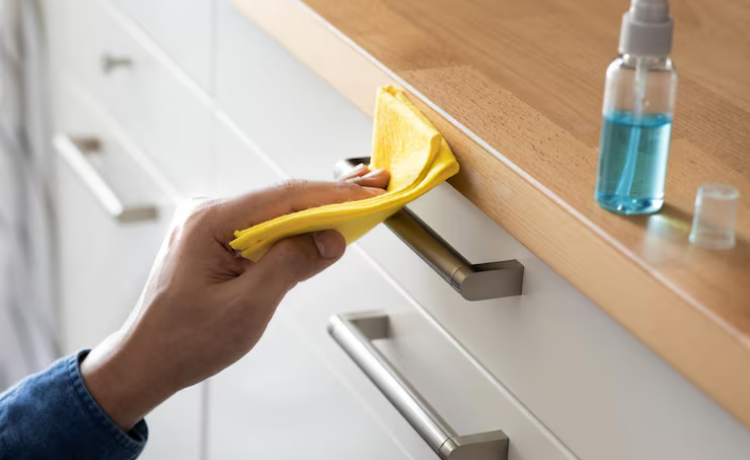
Next, apply the degreaser and scrub gently. Spray the cleaner directly onto a small section of the cabinet or onto your sponge. Work in small, manageable sections, scrubbing in a circular motion to lift the grease. Pay extra attention to areas around knobs, handles, and the stove, as these tend to have the heaviest buildup. A drill brush can be particularly helpful for stubborn spots and carved details.
After scrubbing, rinse with a damp cloth. It’s crucial to remove all traces of the degreaser to ensure proper paint adhesion. Dip a clean cloth in fresh water and wring it out until it is just damp. Wipe down the scrubbed areas thoroughly, rinsing the cloth frequently. Avoid using too much water, as excess moisture can damage wood cabinets.
Finally, dry the cabinets thoroughly before sanding. Use a clean, dry microfiber cloth to wipe away any remaining moisture. Allow the cabinets to air dry completely for at least an hour or two. Any lingering dampness can interfere with the sanding process and affect how the paint applies, so patience is key.
Common Mistakes to Avoid When Degreasing Kitchen Cabinets
Even with the best intentions, it’s easy to make cleaning mistakes that can compromise your final paint job. One of the most common degreasing errors is using too much water on wood cabinets. Wood is porous and can swell, warp, or crack if it becomes saturated. Always use a damp cloth, not a soaking wet one, for rinsing.
Another frequent cabinet prep mistake is not testing the cleaner on a hidden spot first. Different degreasers can react differently with various cabinet materials and finishes. To avoid discoloration or damage, always test your chosen cleaner on an inconspicuous area, such as the inside of a cabinet door, before applying it to all your cabinets.
Lastly, a critical error is skipping the drying step before sanding or painting. Painting over a damp surface is a surefire way to get a blotchy, uneven finish that won’t last. Ensure the cabinets are completely dry to the touch before moving on to the next step. This allows for proper adhesion and a smooth, professional-looking result.
Frequently Asked Questions
Can I use just dish soap to degrease cabinets before painting?
Yes, for cabinets with light to moderate grease, a mixture of warm water and a quality grease-cutting dish soap like Dawn can be effective. Make sure to rinse the surface thoroughly with a clean, damp cloth to remove any soap residue, as leftover film can prevent the paint from adhering properly. For heavy grease buildup, a dedicated degreaser like Krud Kutter or TSP is recommended.
How do I know if my cabinets are clean enough for painting?
After cleaning and drying, run your hand over the cabinet surface. It should feel smooth and clean, not sticky or greasy. Another test is to apply a piece of painter’s tape to a small area. If the tape sticks firmly and removes cleanly without any residue, your cabinets are likely clean enough. If there’s any doubt, it’s better to clean the area again.
Is it safe to use a strong degreaser like TSP on wood cabinets?
Yes, TSP is a popular choice for cleaning wood cabinets before painting because it’s highly effective. However, it’s a powerful chemical and must be handled with care. Always wear gloves and eye protection, and ensure the area is well-ventilated. It’s also crucial to rinse the cabinets thoroughly with clean water to neutralize the TSP and remove all residue.
Should I sand my kitchen cabinets before or after degreasing?
You should always degrease your cabinets before sanding. If you sand a greasy or dirty surface, you risk pushing the grime deeper into the wood grain, making it even harder to remove. Cleaning first provides a clear, stable surface for sanding, which in turn creates the perfect texture for the primer and paint to grip onto.
Also Check: “how to get rid of kitchen knives“
Your Foundation for a Flawless Finish
Successfully painting kitchen cabinets hinges on diligent preparation. Degreasing is not just a preliminary step; it is the foundation upon which your entire project rests. By thoroughly removing grease, oil, and grime, you ensure that your new paint job will adhere smoothly and last for years, giving you a finish that looks truly professional.
As you embark on your kitchen transformation, remember to take your time during this crucial prep phase. Choosing the right cleaner, applying it methodically, and allowing for adequate drying time will pay off immensely. Your patience will be rewarded with beautiful, durable cabinets that refresh and revitalize your entire kitchen.