Establishing a new lawn can feel like a major undertaking. You want a lush, green carpet of grass, but traditional methods like scattering seeds or laying sod come with their own challenges. There is another option that is gaining popularity for its efficiency and effectiveness: hydroseeding.
This method is becoming a go-to for landscaping professionals and homeowners alike, especially for large properties or areas prone to soil erosion. Understanding how hydroseeding works is the first step toward achieving a healthier, more vibrant lawn with less hassle. This guide will walk you through everything you need to know about this innovative technique.
What Is Hydroseeding?
Hydroseeding, also known as hydraulic mulch seeding, is a planting process that uses a slurry of seed and mulch. This slurry is created by mixing grass seed, fertilizer, mulch, and water in a large tank. The mixture is then sprayed over a prepared ground surface using a high-pressure hose. The mulch in the mixture helps bond the seed to the soil, provides moisture, and protects it from the elements, creating an ideal microenvironment for germination.
This technique is highly effective for establishing new lawns, revegetating large commercial properties, and controlling erosion on steep slopes or construction sites. The combination of ingredients in the slurry gives the seeds a strong head start, promoting rapid and uniform growth.
Hydroseeding vs. Traditional Seeding
When planning a new lawn, you typically have three main choices: traditional seeding, sod installation, or hydroseeding.
Traditional dry seeding involves spreading seeds over the soil by hand or with a spreader. While this method is inexpensive, it can result in uneven growth, and the seeds are vulnerable to being washed away by rain or eaten by birds.
Sod installation provides an instant lawn by laying down pre-grown rolls of grass. It’s the fastest way to get a green lawn, but it is also the most expensive and labor-intensive option.
Hydroseeding offers a middle ground. It’s more effective than traditional seeding because the mulch layer protects the seeds and retains moisture, leading to much faster germination. For larger areas, it is significantly more cost-effective than laying sod. You get the quality of a sod-like lawn without the high price tag.
The Benefits of Hydroseeding
Hydroseeding provides a range of advantages that make it an attractive choice for various landscaping needs.
Erosion Control
One of the most significant benefits of hydroseeding is its ability to control soil erosion. The mulch in the slurry creates a protective mat that holds the soil in place, even on steep hillsides, riverbanks, or along roadsides. This makes it an essential tool for stabilizing land after construction or in areas susceptible to wind and water erosion.
Faster Germination and Growth
The hydroseeding slurry creates a perfect environment for seeds. The combination of fertilizer, water, and protective mulch helps seeds germinate much more quickly than with traditional methods. You can often see grass shoots emerging within 7 to 14 days, with a well-established lawn taking shape in just a few weeks.
Cost-Effectiveness
For larger properties, hydroseeding is a budget-friendly alternative to sod. The cost of materials and labor is considerably lower. A 2024 analysis shows that hydroseeding typically costs less than half the price of installing sod, making it an excellent investment for homeowners and commercial property managers looking to cover substantial areas.
Environmental Benefits
Hydroseeding is also an eco-friendly option. The mulch used is often made from recycled paper or wood fibers, and the process generally requires less water than establishing a new lawn from sod. The quick establishment of vegetation also helps filter pollutants and improve air quality.
How Much Does Hydroseeding Cost?
The cost of hydroseeding can vary, but it generally ranges from $0.10 to $0.22 per square foot. The final price depends on several factors, including the size of the area, the type of seed mix used, the current condition of the soil, and your geographic location.
For a typical 10,000-square-foot lawn, you can expect to pay between $1,000 and $2,200. This is significantly more affordable than sod, which can cost between $0.60 and $1.20 per square foot, potentially totaling over $6,000 for the same area. While traditional seeding is the cheapest upfront, the superior results and faster growth of hydroseeding often provide better long-term value.
The Hydroseeding Process: Step-by-Step
A successful hydroseeding project involves careful preparation, application, and follow-up care.
Site Preparation
Proper site preparation is crucial. The ground should be cleared of all existing vegetation, rocks, and debris. The soil should be graded to ensure proper drainage and tilled to a depth of at least a few inches to loosen it. Amending the soil with compost or other organic matter can also improve its quality and help the new grass thrive.
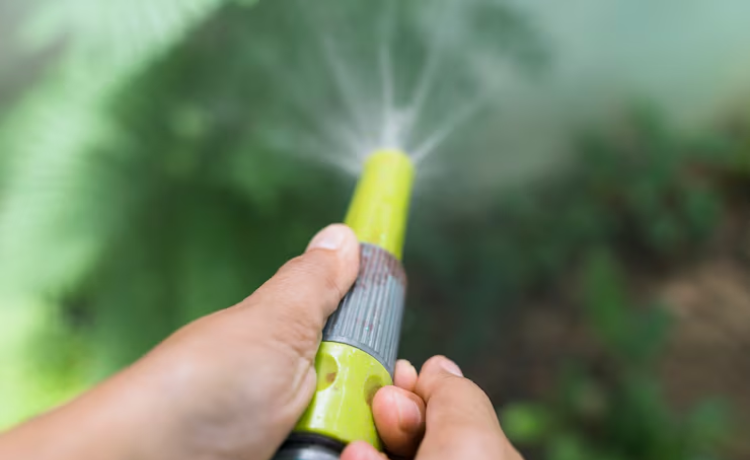
Hydroseeding Application
Once the site is prepared, the hydroseeding slurry is mixed in a specialized tank. This mixture typically includes a high-quality grass seed blend suited for your climate, a starter fertilizer to nourish the seeds, a fiber mulch to protect them, and sometimes a tackifying agent to help it adhere to slopes. The slurry is then evenly sprayed over the entire area using a high-pressure hose, creating a uniform green coating.
Post-Application Care
After the application, the new lawn requires consistent care. Proper watering is the most critical element in the first few weeks. The goal is to keep the mulch layer consistently moist but not saturated. This initial care period is vital for ensuring the seeds germinate and establish strong roots.
How Long Does Hydroseeding Take to Grow?
One of the most exciting aspects of hydroseeding is watching how quickly the lawn develops. You can typically expect to see the first signs of germination within 7 to 14 days.
Within 4 to 6 weeks, the grass should be well on its way to becoming a lush, established lawn. You will notice the coverage becoming thicker and more uniform during this time. With proper care, your hydroseeded lawn will be ready for regular use and mowing in about a month or two.
Hydroseeding Watering and Care Tips
Follow these guidelines to ensure your new hydroseeded lawn grows healthy and strong.
Watering Schedule
For the first two to three weeks, water the lawn lightly two to three times per day. The goal is to keep the top layer of soil and mulch consistently damp. Avoid creating puddles or runoff, as this can dislodge the seeds. After the grass has started to grow, you can reduce watering to once a day, but for a longer duration to encourage deep root growth.
Fertilizing
The initial slurry contains a starter fertilizer that provides essential nutrients for germination. You will need to apply a follow-up fertilizer about four to six weeks after the initial application. This will continue to feed the young grass and help it develop into a thick, healthy turf.
Mowing
You can mow your new lawn for the first time when the grass blades reach about three to four inches in height. Make sure your mower blades are sharp to avoid tearing the young grass. Set the mower to a high setting and only remove about one-third of the grass blade height during the first few mows.
Common Hydroseeding Issues and How to Fix Them
Even with careful planning, you might encounter a few issues.
Poor Germination
If you notice patchy growth, it could be due to inadequate watering, extreme weather conditions, or an unsuitable seed mix. Ensure you are following the recommended watering schedule. If patches persist, you may need to reapply the hydroseeding mixture to those specific areas.
Erosion
On steep slopes or in cases of heavy rain, some seeds might wash away. The mulch and tackifier in the slurry are designed to prevent this, but it can still happen. Addressing these bare spots quickly by reapplying the hydroseeding slurry is the best solution.
Weed Growth
It is normal for some weeds to appear alongside your new grass, as seeds can lie dormant in the soil. Most of these will be crowded out as the grass becomes thicker. Avoid using herbicides on a new lawn for at least the first two months, as they can harm the young grass. Manual removal is the best option initially.
When Should You Consider Hydroseeding?
Hydroseeding is an excellent choice in several scenarios. It’s ideal for large residential lawns, commercial properties, and new construction projects where establishing a lawn from scratch is necessary. It is also the preferred method for erosion control on difficult terrains like hillsides and embankments. If you want a high-quality lawn that establishes quickly without the high cost of sod, hydroseeding is a fantastic solution.
Also check: “pallet garden furniture“
Achieve Your Dream Lawn
Hydroseeding offers a modern, effective, and economical way to establish a beautiful and healthy lawn. By combining the affordability of seeding with results that rival sod, it provides a compelling option for anyone looking to enhance their landscape. From its erosion control capabilities to its rapid growth, the benefits are clear.
If you are considering a new lawn or need to revegetate a challenging area, hydroseeding might be the perfect solution. To get the best results, it’s always a good idea to consult with a professional who can assess your property and provide a tailored approach.
Frequently Asked Questions (FAQs)
How long does it take for hydroseeding to grow?
You will typically see initial grass sprouts within 7 to 14 days. A functional lawn develops in about 4 to 6 weeks, and it becomes fully established and ready for regular traffic within a few months.
Can I walk on my hydroseeded lawn?
It is best to avoid walking on a newly hydroseeded lawn for at least the first 3 to 4 weeks. The young grass seedlings are very delicate and can be easily damaged by foot traffic.
How often should I water after hydroseeding?
For the first 2-3 weeks, water lightly but frequently, about 2-3 times per day, to keep the mulch layer consistently moist. After germination, you can switch to watering once a day for a longer period.
What should I do if my hydroseeding doesn’t grow properly?
If you notice patchy or poor growth, the most common causes are improper watering, poor soil conditions, or extreme weather. Contact the hydroseeding professional who did the application. They can help diagnose the problem and may recommend reapplying the slurry to bare spots.
What time of year is best for hydroseeding?
The best times for hydroseeding are spring and early fall. During these seasons, the temperatures are moderate, and there is typically more rainfall, which creates ideal conditions for seed germination and growth.