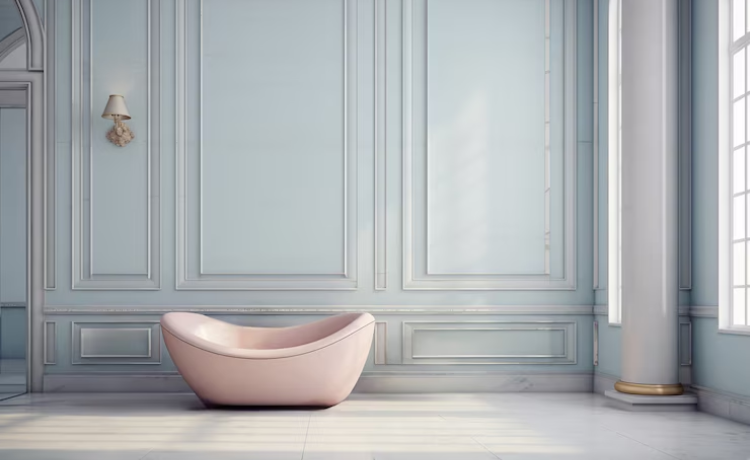
Board and batten bathroom is a classic wall treatment that can instantly elevate the look and feel of any bathroom. This timeless design adds texture, depth, and architectural interest to your space while complementing a variety of styles, from traditional to modern. It’s a versatile and cost-effective way to achieve a polished and sophisticated aesthetic.
Board and batten has emerged as one of the most sought-after wall treatments in bathroom design, offering a perfect blend of traditional charm and modern sophistication. This versatile design element creates visual interest while adding texture and depth to what might otherwise be a plain bathroom wall.
As a home renovation expert with over 10 years of experience transforming bathrooms across the country, I’ve witnessed firsthand how board and batten can completely revolutionize a space. From cramped powder rooms to spacious master suites, this vertical wall treatment has the power to make any bathroom feel more polished and intentional.
The surge in popularity isn’t accidental. Board and batten strikes the perfect balance between achievable DIY project and professional-looking result. Whether you’re drawn to farmhouse aesthetics, traditional styling, or contemporary design, this wall treatment adapts beautifully to various decorating approaches.
Throughout this comprehensive guide, you’ll discover everything needed to successfully incorporate board and batten into your bathroom renovation. We’ll explore design possibilities, tackle moisture concerns, provide step-by-step installation instructions, and share insider tips that ensure your project succeeds.
What Is Board and Batten?
Board and batten originated in medieval Europe as a practical building technique, where wide boards were placed vertically with narrow strips covering the seams between them. This method created weatherproof exterior walls that could withstand harsh conditions while maintaining structural integrity.
The architectural style made its way to America during colonial times, where it became synonymous with farmhouses and rural buildings. Today’s interior applications maintain the same fundamental principle but serve primarily decorative purposes, creating sophisticated wall treatments that add character and visual appeal.
Understanding the distinction between board and batten and other popular wall treatments helps make informed design decisions. While shiplap features horizontal boards with overlapping edges, board and batten runs vertically with gaps between boards covered by narrow strips called battens. Wainscoting typically refers to any decorative paneling on the lower portion of walls, which can include board and batten as one variation.
Modern bathroom applications of board and batten range from subtle accent walls to full-room installations. The vertical lines create an illusion of height, making standard eight-foot ceilings appear taller. This effect proves particularly beneficial in smaller bathrooms where every visual trick counts.
Farmhouse style bathrooms often feature board and batten painted in crisp white or soft cream tones, creating a clean backdrop for vintage-inspired fixtures and accessories. Traditional bathroom designs might incorporate darker paint colors like navy or forest green, while contemporary spaces might use board and batten as a textural element painted in the same color as surrounding walls.
The board and batten accent wall has become especially popular, allowing homeowners to incorporate this design element without overwhelming the space. Many designers recommend placing board and batten on the wall behind the vanity or bathtub, creating a focal point that anchors the room’s design.
Is Board and Batten Suitable for Bathrooms?
Moisture resistance represents the primary concern when considering paneling in bathroom applications. Bathrooms experience daily humidity fluctuations, steam from hot showers, and occasional water splashes that can damage improperly installed or unsuitable materials.
The good news is that board and batten can absolutely work in bathrooms when proper materials and installation techniques are employed. The key lies in selecting appropriate materials and taking steps to protect the installation from moisture infiltration.
Moisture-resistant MDF has become the material of choice for many bathroom board and batten installations. Unlike traditional wood, moisture-resistant MDF is engineered to withstand humidity without warping, swelling, or developing mold issues. This material accepts paint beautifully and costs significantly less than solid wood alternatives.
Solid wood remains an option for bathroom applications, but species selection matters enormously. Cedar, redwood, and treated pine offer natural moisture resistance, while oak and maple require careful sealing to prevent problems. Regardless of wood type, proper priming and painting with high-quality bathroom paint are essential.
The advantages of bathroom wall molding extend beyond aesthetics. Board and batten protects wall surfaces from minor impacts and provides an additional barrier against moisture when properly sealed. The raised profile also makes walls easier to clean, as smooth surfaces between battens can be wiped down quickly.
However, board and batten does present some challenges in bathroom environments. The gaps between boards can collect soap residue, dust, and moisture if not properly maintained. Installation requires careful attention to sealing and caulking, particularly around fixtures and in areas prone to water exposure.
Proper ventilation becomes even more critical in bathrooms with board and batten installations. Exhaust fans should be sized appropriately and used consistently to remove excess moisture from the air. This prevents condensation from settling into gaps and crevices where it might cause long-term damage.
Design Ideas for Board and Batten Bathrooms
The decision between full wall and half wall board and batten installations significantly impacts both the visual effect and practical considerations. Half wall installations, typically extending 36 to 48 inches from the floor, offer easier maintenance while still providing substantial visual impact. This approach works particularly well in powder rooms and smaller bathrooms where full coverage might feel overwhelming.
Full wall board and batten creates dramatic vertical lines that can make spaces feel taller and more substantial. This approach works beautifully in larger bathrooms or spaces with high ceilings where the additional visual weight enhances rather than crowds the room.
Paint color selection can completely transform the character of a board and batten bathroom. Classic white remains the most popular choice, offering timeless appeal that complements virtually any design style. White board and batten creates a clean, fresh backdrop that makes other design elements pop while maintaining a sense of spaciousness.
Navy blue board and batten has gained tremendous popularity, particularly in traditional and transitional bathroom designs. This bold color choice creates sophisticated contrast against white fixtures and adds depth to the space. Navy works especially well in larger bathrooms where the dark color won’t make the space feel cramped.
Sage green represents another trending color choice that brings natural, calming energy to bathroom spaces. This soft, muted tone pairs beautifully with brass fixtures and natural wood accents, creating a spa-like atmosphere that feels both current and timeless.
The tile and board and batten combo opens up exciting design possibilities. Many homeowners choose to install board and batten on the lower portion of walls with subway tile or other ceramic options above. This approach provides maximum moisture protection in shower areas while maintaining the design continuity of board and batten elsewhere in the room.
Another popular combination involves using board and batten as wainscoting with wallpaper above. This creates visual interest and allows for pattern incorporation without overwhelming the space. The board and batten provides a clean transition between the wallpaper and floor while adding textural contrast.
Farmhouse style bathroom designs often feature board and batten paired with vessel sinks, vintage-inspired lighting, and natural wood vanities. The combination creates a cohesive rustic aesthetic that feels both comfortable and refined.
Traditional bathroom trim applications might incorporate board and batten as part of a larger millwork scheme, combined with crown molding, chair rails, and other architectural details. This approach creates a more formal, established feeling that works well in period homes or spaces seeking that aesthetic.
How to Install Board and Batten in a Bathroom
Successful board and batten installation requires careful planning, proper materials, and attention to moisture-proofing details. The tools needed include a miter saw, drill, level, stud finder, caulk gun, and measuring tape. Material requirements include boards, battens, construction adhesive, screws, primer, and paint.
The first step involves measuring the wall and determining board spacing. Most installations use boards ranging from 6 to 12 inches wide with 1 to 2-inch battens covering the seams. Mark stud locations using a stud finder, as battens should be secured to studs whenever possible for maximum stability.
Begin installation with the boards themselves, cutting each piece to the appropriate height and checking for plumb installation. In bathrooms, pay special attention to areas around fixtures, outlets, and switches, marking and cutting precise openings before installation.
Apply construction adhesive to the back of each board before positioning, then secure with screws driven through the board into wall studs. This dual attachment method ensures boards remain flat and secure even in high-humidity environments.
Waterproof board and batten installation requires careful attention to sealing. Apply a continuous bead of high-quality caulk along the bottom edge where boards meet the floor, and around any penetrations for plumbing or electrical fixtures. This creates a moisture barrier that prevents water from getting behind the installation.
Install battens over the seams between boards, ensuring they’re level and properly spaced. Secure battens to wall studs where possible, using construction adhesive and finish nails for attachment. The combination provides holding power while minimizing visible fasteners.
Prime all surfaces with a high-quality primer designed for bathroom use before applying paint. This step is crucial for moisture protection and paint adhesion. Use a brush to work primer into all gaps and crevices, ensuring complete coverage.
Apply paint in thin, even coats, allowing proper drying time between applications. Semi-gloss or satin finishes work best in bathrooms, offering easier cleaning and better moisture resistance than flat paints.
The materials for bathroom wall installation typically cost between $3 to $8 per square foot for a DIY project, depending on material choices and regional pricing. Professional installation usually ranges from $10 to $20 per square foot, including materials and labor.
DIY board and batten bathroom projects can save significant money while providing personal satisfaction. However, consider hiring professionals for complex installations involving plumbing modifications or if you lack experience with precision carpentry work.
Maintenance and Cleaning Tips
Regular maintenance ensures board and batten bathroom installations remain beautiful and functional for years to come. The key to success lies in establishing consistent cleaning routines and addressing issues promptly before they become major problems.
Daily maintenance involves wiping down surfaces with a damp cloth to remove soap residue, water spots, and general bathroom grime. Pay special attention to the gaps between boards and battens, where debris tends to accumulate. A soft-bristled brush can help remove buildup from these recessed areas.
Weekly deep cleaning should include washing the entire board and batten surface with a mild detergent solution. Avoid harsh chemicals that might damage paint finishes or compromise moisture barriers. A mixture of warm water and gentle dish soap works well for most cleaning needs.
The gaps between boards require special attention during cleaning. Use a detail brush or old toothbrush to work a cleaning solution into these areas, removing any accumulated soap scum or mineral deposits. Rinse thoroughly with clean water and dry completely to prevent moisture retention.
Preventing mold and water damage requires vigilance and proper ventilation. Always run exhaust fans during and after showers to remove excess moisture from the air. Address any signs of water infiltration immediately, as small problems can quickly become major issues in bathroom environments.
Bathroom wall protection extends beyond regular cleaning to include periodic inspection and maintenance. Check caulk seals around fixtures, along floor lines, and at any penetrations through the board and batten. Replace deteriorated caulk promptly to maintain moisture barriers.
Paint finishes play a crucial role in protecting board and batten installations. Semi-gloss and satin finishes
You would also like: “sewer smell in bathroom“
Conclusion
Proper maintenance and attention to detail are essential for preserving the integrity of board and batten installations in bathroom environments. By addressing water infiltration, ensuring effective caulk seals, and selecting appropriate paint finishes, you can extend the lifespan of your bathroom walls while maintaining their aesthetic appeal. Regular inspections and timely repairs will help keep the space functional, beautiful, and protected from moisture-related damage.
FAQ
1. Can board and batten be used in high-moisture areas like a bathroom?
Yes, board and batten can be used in bathrooms, but proper precautions are necessary. Ensure the wood or material is sealed properly with water-resistant paint or finishes. Using moisture-resistant materials such as PVC for the battens is also a good option. Additionally, maintaining proper ventilation in the bathroom will help reduce excessive humidity.
2. What kind of paint is best for bathroom board and batten?
For bathroom environments, it is recommended to use a high-quality, water-resistant, mildew-resistant paint with a satin or semi-gloss finish. These finishes are more durable and easier to clean, making them better suited for high-moisture areas compared to matte finishes.
3. How do I prevent water damage to my board and batten installation?
To prevent water damage, pay attention to sealing gaps and edges with high-quality caulking that is resistant to mildew. Regularly inspect areas around sinks, tubs, and showers to ensure there is no water infiltration. Additionally, applying a durable sealant over the paint can provide an extra layer of protection.
4. Are there alternatives to wood for board and batten in bathrooms?
Yes, there are several alternatives to wood that are more moisture-resistant, such as MDF (medium-density fiberboard) treated for moisture resistance, PVC, or vinyl. These materials mimic the look of wood while being less prone to warping, swelling, or rot in high-humidity environments.
5. How often should I inspect and maintain my bathroom’s board and batten?
Regular inspections every 3-6 months are recommended to identify any potential issues such as peeling paint, cracked caulking, or signs of water damage. Prompt repairs and touch-ups will help preserve the integrity and appearance of the installation and prevent long-term moisture-related problems.
6. Can I install a board and batten as a DIY project in the bathroom?
Yes, installing board and batten in the bathroom can be a DIY project with the right tools, materials, and preparation. Ensure you have a reliable measuring tape, saw, level, caulk, and paint. Following proper steps, including prepping the surface and sealing gaps, will result in a durable and attractive installation. For more complex designs or in homes with unique structural challenges, consulting a professional may be advisable.
